Pickleball Net Setup
A pickleball net is not the same as a tennis or badminton net. It has different dimensions, materials, and tension. A pickleball net should be 22 feet wide and 36 inches high at the sidelines, and 34 inches high at the center. It should also have a center strap that adjusts the net tension and keeps it at the correct height.
A pickleball net should be made of durable and weather-resistant materials, such as nylon, polyester, or vinyl. It should also have a mesh material that allows air to pass through and reduces wind interference.
There are two main types of pickleball nets: permanent and portable. Permanent pickleball nets are fixed to the ground and are usually installed in dedicated pickleball courts or public tennis courts. Portable pickleball nets are easy to assemble and disassemble, and can be used on any flat and smooth surface, such as driveways, parking lots, or gym floors. Portable pickleball nets are ideal for people who want to play pickleball anywhere and anytime, without having to worry about finding a suitable court.
In this article, we will focus on how to set up a portable pickleball net, as it is more convenient and versatile for most players. We will also show you how to adjust a tennis net for pickleball, in case you want to use an existing tennis court for pickleball.
Pickleball Net Stand Options
One of the most important components of a portable pickleball net is the net stand. The net stand is the part that supports the net and keeps it stable and secure. The net stand consists of two end posts, a base frame, and a center support.
The end posts are the vertical poles that hold the net at the correct height and width. The base frame is the horizontal structure that connects the end posts and provides a solid base for the net. The center support is the part that attaches to the center strap of the net and keeps it at the right tension and height.
There are many options for pickleball net stands, depending on your budget, preference, and availability. You can buy a ready-made pickleball net stand from online or offline stores, or you can make your own net stand from everyday items. Here are some of the most common pickleball net stand options:
Net Stands Made from Everyday Items
If you want to save money and be creative, you can make your own pickleball net stand from everyday items that you can find at home or at a hardware store. Here are some examples of net stands made from everyday items:
Net Stands Made from Chain Link Fence Rail
One of the easiest and cheapest ways to make a pickleball net stand is to use chain link fence rail. Chain link fence rail is a metal pipe that is used to support chain link fences. You can buy chain link fence rail from any hardware store or online. To make a pickleball net stand from chain link fence rail, you will need the following items:
- Four pieces of chain link fence rail, each 10 feet long
- Four elbow connectors, compatible with the chain link fence rail
- Four end caps, compatible with the chain link fence rail
- A drill and screws
- A tape measure and a marker
To assemble the net stand, follow these steps:
- Cut two pieces of chain link fence rail to 22 feet long, using a hacksaw or a pipe cutter. These will be the base pieces of the net stand.
- Cut the remaining two pieces of chain link fence rail to 36 inches long. These will be the end posts of the net stand.
- Attach an elbow connector to each end of the base pieces, using screws and a drill. Make sure the elbow connectors are facing upward.
- Attach an end cap to each end of the end posts, using screws and a drill. This will prevent the end posts from scratching the surface or injuring anyone.
- Insert the end posts into the elbow connectors of the base pieces, forming a U-shape. Make sure the end posts are perpendicular to the base pieces and aligned with the center of the elbow connectors.
- Mark the center of the base pieces with a marker, using a tape measure. This will be the location of the center support.
- Drill a hole through the center of the base pieces, using a drill and a bit that is slightly larger than the diameter of the chain link fence rail.
- Cut a piece of chain link fence rail to 34 inches long. This will be the center support of the net stand.
- Insert the center support through the holes of the base pieces, forming a cross. Make sure the center support is parallel to the end posts and aligned with the center of the base pieces.
- Secure the center support to the base pieces, using screws and a drill.
You have now completed your pickleball net stand made from chain link fence rail. You can attach your pickleball net to the net stand, following the instructions in Section 3.
Net Stands Made from PVC
Another easy and cheap way to make a pickleball net stand is to use PVC pipes. PVC pipes are plastic pipes that are used for plumbing and drainage. You can buy PVC pipes from any hardware store or online. To make a pickleball net stand from PVC pipes, you will need the following items:
- Four pieces of PVC pipe, each 10 feet long and 1.5 inches in diameter
- Four elbow connectors, compatible with the PVC pipe
- Four end caps, compatible with the PVC pipe
- A drill and screws
- A tape measure and a marker
- PVC cement
To assemble the net stand, follow these steps:
- Cut two pieces of PVC pipe to 22 feet long, using a hacksaw or a pipe cutter. These will be the base pieces of the net stand.
- Cut the remaining two pieces of PVC pipe to 36 inches long. These will be the end posts of the net stand.
- Attach an elbow connector to each end of the base pieces, using PVC cement. Make sure the elbow connectors are facing upward.
- Attach an end cap to each end of the end posts, using PVC cement. This will prevent the end posts from scratching the surface or injuring anyone.
- Insert the end posts into the elbow connectors of the base pieces, forming a U-shape. Make sure the end posts are perpendicular to the base pieces and aligned with the center of the elbow connectors.
- Mark the center of the base pieces with a marker, using a tape measure. This will be the location of the center support.
- Drill a hole through the center of the base pieces, using a drill and a bit that is slightly larger than the diameter of the PVC pipe.
- Cut a piece of PVC pipe to 34 inches long. This will be the center support of the net stand.
- Insert the center support through the holes of the base pieces, forming a cross. Make sure the center support is parallel to the end posts and aligned with the center of the base pieces.
- Secure the center support to the base pieces, using screws and a drill.
You have now completed your pickleball net stand made from PVC pipes. You can attach your pickleball net to the net stand, following the instructions in Section 3.
Net Stand Made from 5-Gallon Paint Buckets
If you want to make a pickleball net stand that is more stable and sturdier, you can use 5-gallon paint buckets. 5-gallon paint buckets are large plastic containers that are used to store paint or other liquids. You can buy 5-gallon paint buckets from any hardware store or online. To make a pickleball net stand from 5-gallon paint buckets, you will need the following items:
- Two 5-gallon paint buckets, with lids
- Two pieces of PVC pipe, each 10 feet long and 1.5 inches in diameter
- Two end caps, compatible with the PVC pipe
- A drill and screws
- A tape measure and a marker
- PVC cement
- Sand or gravel
To assemble the net stand, follow these steps:
- Cut the PVC pipes to 36 inches long, using a hacksaw or a pipe cutter. These will be the end posts of the net stand.
- Attach an end cap to each end of the PVC pipes, using PVC cement. This will prevent the PVC pipes from scratching the surface or injuring anyone.
- Mark the center of the lids of the 5-gallon paint buckets with a marker, using a tape measure.
- Drill a hole through the center of the lids of the 5-gallon paint buckets, using a drill and a bit that is slightly larger than the diameter of the PVC pipe.
- Insert the PVC pipes through the holes of the lids, forming a T-shape. Make sure the PVC pipes are perpendicular to the lids and aligned with the center of the lids.
- Secure the PVC pipes to the lids, using screws and a drill.
- Fill the 5-gallon paint buckets with sand or gravel, up to the brim. This will add weight and stability to the net stand.
- Close the lids of the 5-gallon paint buckets, making sure they are tight and secure.
You have now completed your pickleball net stand made from 5-gallon paint buckets. You can attach your pickleball net to the net stand, following the instructions in Section 3.
Cast Iron Base for Outdoor Umbrella Stand
If you want to make a pickleball net stand that is more elegant and durable, you can use a cast iron base for outdoor umbrella stand. A cast iron base for outdoor umbrella stand is a heavy metal base that is used to support outdoor umbrellas. You can buy a cast iron base for outdoor umbrella stand from any hardware store or online. To make a pickleball net stand from a cast iron base for outdoor umbrella stand, you will need the following items:
- Two cast iron bases for outdoor umbrella stand, with poles
- Two pieces of PVC pipe, each 10 feet long and 1.5 inches in diameter
- Two end caps, compatible with the PVC pipe
- A drill and screws
- A tape measure and a marker
- PVC cement
To assemble the net stand, follow these steps:
- Cut the PVC pipes to 36 inches long, using a hacksaw or a pipe cutter. These will be the end posts of the net stand.
- Attach an end cap to each end of the PVC pipes, using PVC cement. This will prevent the PVC pipes from scratching the surface or injuring anyone.
- Mark the center of the poles of the cast iron bases with a marker, using a tape measure.
- Drill a hole through the center of the poles of the cast iron bases, using a drill and a bit that is slightly larger than the diameter of the PVC pipe.
- Insert the PVC pipes through the holes of the poles of the cast iron bases, forming a T-shape. Make sure the PVC pipes are perpendicular to the poles and aligned with the center of the poles.
- Secure the PVC pipes to the poles of the cast iron bases, using screws and a drill.
You have now completed your pickleball net stand made from cast iron bases for outdoor umbrella stand. You can attach your pickleball net to the net stand, following the instructions in Section 3.
Concrete Base for Outdoor Umbrella Stand
If you want to make a pickleball net stand that is more permanent and sturdier, you can use a concrete base for outdoor umbrella stand. A concrete base for outdoor umbrella stand is a solid concrete base that is used to support outdoor umbrellas.
You can buy a concrete base for outdoor umbrella stand from any hardware store or online. To make a pickleball net stand from a concrete base for outdoor umbrella stand, you will need the following items:
- Two concrete bases for outdoor umbrella stand, with poles
- Two pieces of PVC pipe, each 10 feet long and 1.5 inches in diameter
- Two end caps, compatible with the PVC pipe
- A drill and screws
- A tape measure and a marker
- PVC cement
To assemble the net stand, follow these steps:
- Cut the PVC pipes to 36 inches long, using a hacksaw or a pipe cutter. These will be the end posts of the net stand.
- Attach an end cap to each end of the PVC pipes, using PVC cement. This will prevent the PVC pipes from scratching the surface or injuring anyone.
- Mark the center of the poles of the concrete bases with a marker, using a tape measure.
- Drill a hole through the center of the poles of the concrete bases, using a drill and a bit that is slightly larger than the diameter of the PVC pipe.
- Insert the PVC pipes through the holes of the poles of the concrete bases, forming a T-shape. Make sure the PVC pipes are perpendicular to the poles and aligned with the center of the poles.
- Secure the PVC pipes to the poles of the concrete bases, using screws and a drill.
You have now completed your pickleball net stand made from concrete bases for an outdoor umbrella stand. You can attach your pickleball net to the net stand, following the instructions in Section 3.
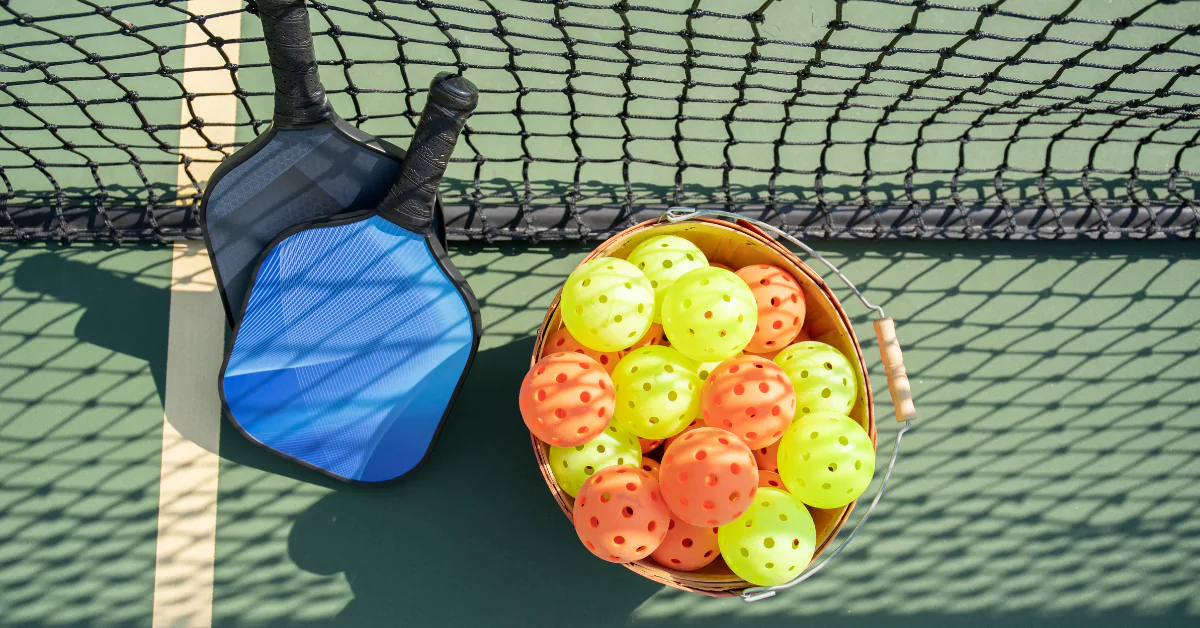
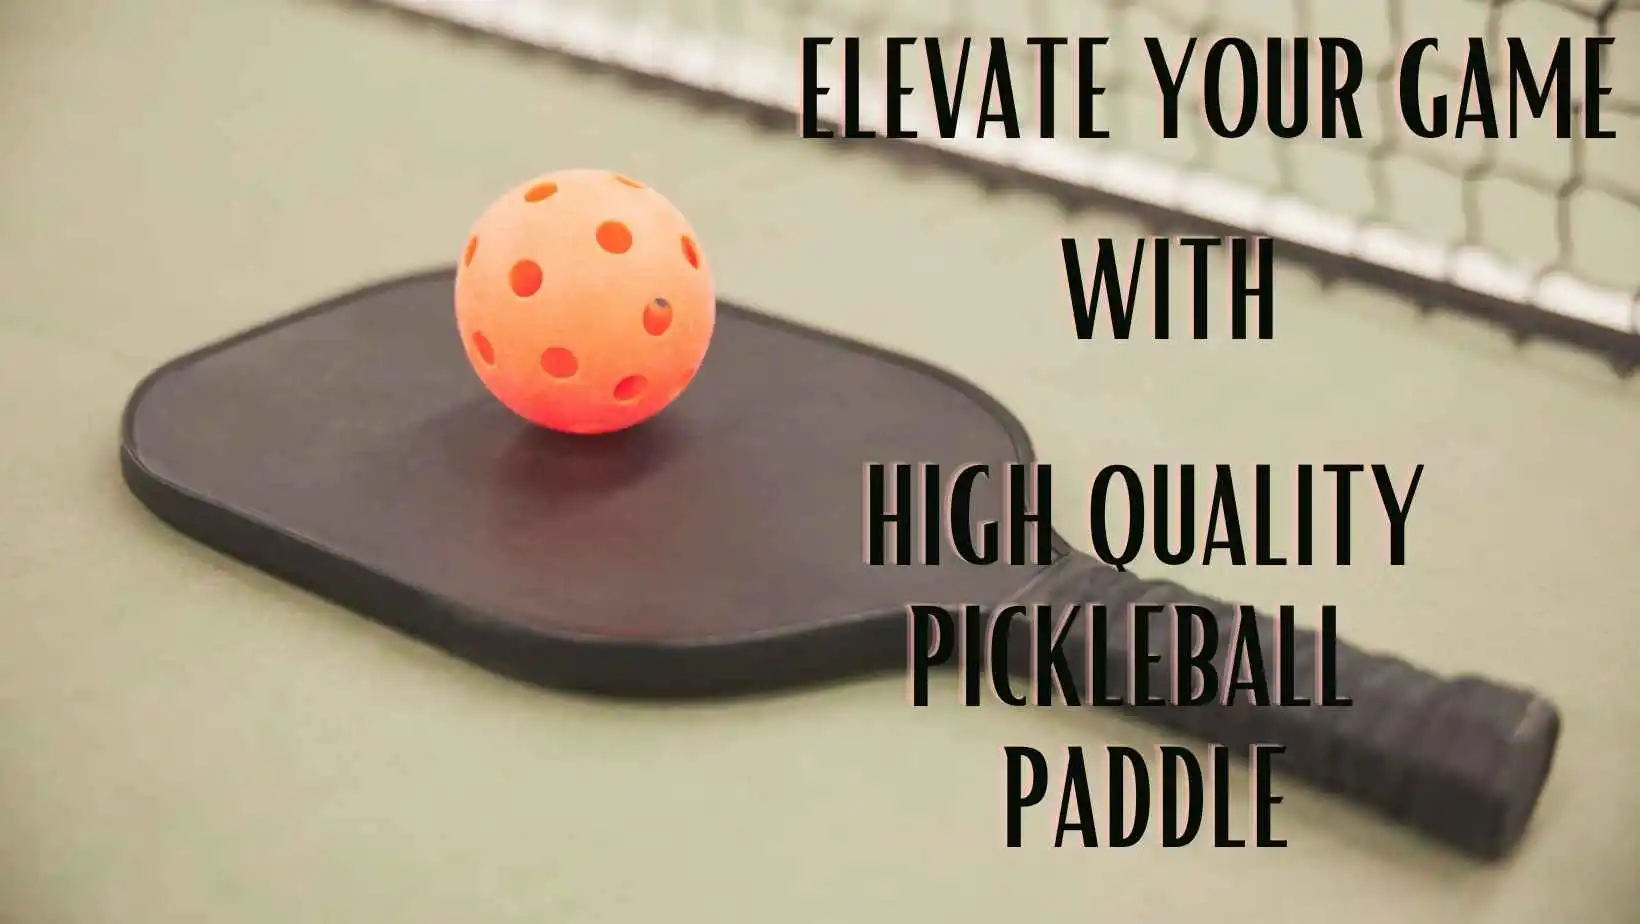
Components of a Pickleball Net
A pickleball net is the part that separates the two sides of the court and creates a challenge for the players to hit the ball over it. A pickleball net is different from a tennis or badminton net in terms of height, width, and tension.
A pickleball net should be 22 feet wide and 36 inches high at the sidelines, and 34 inches high at the center. It should also have a center strap that adjusts the net tension and keeps it at the correct height.
A pickleball net should be made of durable and weather-resistant materials, such as nylon, polyester, or vinyl. It should also have a mesh material that allows air to pass through and reduces wind interference.
There are four main components of a pickleball net: the net sleeve, the net, the center strap, and the loop strap. The net sleeve is the part that covers the end posts of the net stand and holds the net in place.
The net sleeve should be made of strong and flexible material, such as canvas or vinyl. The net sleeve should have a slit on the top and a hole on the bottom, to allow the net to pass through. The net sleeve should also have a velcro strap on the top, to secure the net to the end post.
The net is the part that hangs between the end posts and creates the barrier for the ball. The net should be made of durable and weather-resistant material, such as nylon, polyester, or vinyl. The net should have a mesh material that allows air to pass through and reduces wind interference.
The net should also have a white band on the top and bottom, to make it more visible and attractive. The net should have a metal cable on the top and a rope on the bottom, to attach it to the end posts and the center strap.
The center strap is the part that attaches to the center support of the net stand and adjusts the net tension and height. The center strap should be made of strong and adjustable material, such as nylon or polyester. The center strap should have a buckle or a hook on one end, to attach it to the center support. The center strap should also have a loop on the other end, to attach it to the metal cable of the net.
The loop strap is the part that attaches to the bottom of the end posts and secures the net to the net stand. The loop strap should be made of elastic and flexible material, such as rubber or nylon. The loop strap should have a loop on one end, to attach it to the rope of the net. The loop strap should also have a hook on the other end, to attach it to the bottom of the end post.
For Details Exploring: Pickleball Net Accessories For Portable Nets
These are the components of a pickleball net that you need to know before setting up your pickleball net. In the next section, we will show you how to set up your pickleball net in 7 easy steps.
Section 3: Step-By-Step Pickleball Net Setup
Now that you have learned about the options for net stands and the components of a pickleball net, you are ready to set up your pickleball net. Setting up a pickleball net is not difficult, but it requires some attention and care.
You want to make sure that your pickleball net is stable, secure, and at the right height and tension. To help you set up your pickleball net, we have prepared a step-by-step guide that will walk you through the process. Here are the 7 easy steps to set up your pickleball net:
7 Easy Steps to Set Up Your Pickleball Net
Step 1: Assemble the Base Frame
The first step to set up your pickleball net is to assemble the base frame of the net stand. The base frame is the horizontal structure that connects the end posts and provides a solid base for the net. Depending on the type of net stand you have, the base frame may be different. However, the general principle is the same: you want to connect the two end posts with a horizontal piece that is 22 feet long. If you have a ready-made net stand, you can simply follow the product instructions to assemble the base frame. If you have a homemade net stand, you can use the methods we described in Section 1 to assemble the base frame. For example, if you have a net stand made from chain link fence rail, you can use the elbow connectors and screws to connect the end posts with the base pieces. Make sure the base frame is flat and level, and that the end posts are perpendicular to the base frame and aligned with the center of the elbow connectors.
Step 2: Insert the End Post into the End Base
The second step to set up your pickleball net is to insert the end post into the end base of the net stand. The end post is the vertical pole that holds the net at the correct height and width. The end base is the part that supports the end post and keeps it stable and secure. Depending on the type of net stand you have, the end base may be different. However, the general principle is the same: you want to insert the end post into the end base, and make sure it is tight and secure. If you have a ready-made net stand, you can simply follow the product instructions to insert the end post into the end base. If you have a homemade net stand, you can use the methods we described in Section 1 to insert the end post into the end base. For example, if you have a net stand made from 5-gallon paint buckets, you can insert the PVC pipe through the hole of the lid, and secure it with screws. Make sure the end post is perpendicular to the end base and aligned with the center of the lid.
Step 3: Adjusting the Net Center Strap
The third step to set up your pickleball net is to adjust the net center strap. The net center strap is the part that attaches to the center support of the net stand and adjusts the net tension and height. The net center strap should be made of strong and adjustable material, such as nylon or polyester. The net center strap should have a buckle or a hook on one end, to attach it to the center support. The net center strap should also have a loop on the other end, to attach it to the metal cable of the net. To adjust the net center strap, follow these steps:
- Attach the buckle or hook of the net center strap to the center support of the net stand, making sure it is secure and tight.
- Attach the loop of the net center strap to the metal cable of the net, making sure it is secure and tight.
- Adjust the length of the net center strap, using the buckle or the hook, until the net is at the correct height and tension. The net should be 34 inches high at the center, and should have a slight sag in the middle. You can use a tape measure to check the net height and tension.
- Make sure the net center strap is parallel to the end posts and aligned with the center of the base frame.
Step 4: Inserting the Net Sleeve into Vertical End Post
The fourth step to set up your pickleball net is to insert the net sleeve into the vertical end post of the net stand. The net sleeve is the part that covers the end post and holds the net in place. The net sleeve should be made of strong and flexible material, such as canvas or vinyl. The net sleeve should have a slit on the top and a hole on the bottom, to allow the net to pass through. The net sleeve should also have a velcro strap on the top, to secure the net to the end post. To insert the net sleeve into the vertical end post, follow these steps:
- Slide the net sleeve over the end post, making sure the slit is facing upward and the hole is facing downward.
- Pass the metal cable of the net through the slit of the net sleeve, and pull it until it reaches the other end of the net sleeve.
- Pass the rope of the net through the hole of the net sleeve, and pull it until it reaches the other end of the net sleeve.
- Secure the net to the end post, using the velcro strap of the net sleeve. Make sure the velcro strap is tight and aligned with the top of the end post.
- Repeat the same steps for the other end of the net.
Step 5: Expanding the Net towards the Other End Post
The fifth step to set up your pickleball net is to expand the net towards the other end post of the net stand. The net is the part that hangs between the end posts and creates the barrier for the ball. The net should be made of durable and weather-resistant material, such as nylon, polyester, or vinyl. The net should have a mesh material that allows air to pass through and reduces wind interference. The net should also have a white band on the top and bottom, to make it more visible and attractive. The net should have a metal cable on the top and a rope on the bottom, to attach it to the end posts and the center strap. To expand the net towards the other end post, follow these steps:
- Hold the metal cable of the net with one hand, and the rope of the net with the other hand.
- Walk towards the other end post of the net stand, while pulling the metal cable and the rope of the net.
- Make sure the net is evenly stretched and aligned with the end posts and the center strap.
- Make sure the net is 22 feet wide and 36 inches high at the sidelines, and 34 inches high at the center. You can use a tape measure to check the net dimensions.
Step 6: Tighten the Center Strap
The sixth step to set up your pickleball net is to tighten the center strap. The center strap is the part that attaches to the center support of the net stand and adjusts the net tension and height. The center strap should be made of strong and adjustable material, such as nylon or polyester. The center strap should have a buckle or a hook on one end, to attach it to the center support. The center strap should also have a loop on the other end, to attach it to the metal cable of the net. To tighten the center strap, follow these steps:
- Pull the buckle or the hook of the center strap, until the net is at the correct height and tension. The net should be 34 inches high at the center, and should have a slight sag in the middle. You can use a tape measure to check the net height and tension.
- Make sure the center strap is parallel to the end posts and aligned with the center of the base frame.
- Secure the buckle or the hook of the center strap, making sure it is tight and locked.
Step 7: Adjusting the Strap below the Bottom of the End Post
The seventh and final step to set up your pickleball net is to adjust the strap below the bottom of the end post. The strap below the bottom of the end post is the part that attaches to the bottom of the end post and secures the net to the net stand. The strap below the bottom of the end post should be made of elastic and flexible material, such as rubber or nylon. The strap below the bottom of the end post should have a loop on one end, to attach it to the rope of the net. The strap below the bottom of the end post should also have a hook on the other end, to attach it to the bottom of the end post. To adjust the strap below the bottom of the end post, follow these steps:
- Attach the loop of the strap below the bottom of the end post to the rope of the net, making sure it is secure and tight.
- Attach the hook of the strap below the bottom of the end post to the bottom of the end post, making sure it is secure and tight.
- Adjust the length of the strap below the bottom of the end post, using the hook, until the net is at the correct height and tension. The net should be 36 inches high at the sidelines, and should have a slight sag in the middle. You can use a tape measure to check the net height and tension.
- Repeat the same steps for the other end of the net.
You have now completed the 7 easy steps to set up your pickleball net. You can now enjoy playing pickleball with your friends and family.
Also Read: Portability And Setup Of Indoor And Outdoor Pickleball Nets
Portable Net Size And Indoor/Outdoor Distinctions
Section 4: Maintaining Your Pickleball Net
Setting up your pickleball net is not enough to enjoy the game of pickleball. You also need to maintain your pickleball net and keep it in good condition. A pickleball net is exposed to various elements, such as sun, rain, wind, dust, and dirt. These elements can damage your pickleball net and affect its performance and appearance. To prevent your pickleball net from deteriorating and ensure its long-lasting performance, you need to follow some tips for maintaining your pickleball net. Here are some of the tips for maintaining your pickleball net:
Tips for Long-lasting Net Performance
Regular Inspection and Cleaning
One of the most important tips for maintaining your pickleball net is to inspect and clean it regularly. You should inspect your pickleball net before and after each use, and look for any signs of wear and tear, such as holes, tears, frays, or loose threads. You should also check the net components, such as the net sleeve, the net, the center strap, and the loop strap, and make sure they are intact and secure. If you find any damage or defect, you should repair or replace the affected part as soon as possible.
You should also clean your pickleball net regularly, and remove any dirt, dust, or debris that may have accumulated on it. You can use a soft brush or a cloth to gently wipe the surface of the net. You can also use a mild soap and water solution to wash the net, if it is very dirty. However, you should avoid using harsh chemicals or abrasive materials, as they may damage the net material. You should also rinse the net thoroughly with clean water, and let it dry completely before storing it.
Storage Considerations
Another important tip for maintaining your pickleball net is to store it properly when not in use. You should store your pickleball net in a cool, dry, and shaded place, away from direct sunlight, heat, moisture, and rodents. You should also store your pickleball net in a protective bag or case, to prevent it from getting dirty or damaged. You should also fold or roll your pickleball net carefully, and avoid creasing or twisting it. You should also detach the net from the net stand, and store them separately, to avoid putting stress on the net components.
Repairs and Replacements
The final tip for maintaining your pickleball net is to repair or replace it when necessary. Even if you follow the previous tips, your pickleball net may still get damaged or worn out over time. If your pickleball net is beyond repair, you should replace it with a new one. You can buy a new pickleball net from online or offline stores, or you can make your own pickleball net from everyday items. You can also contact the manufacturer or the seller of your pickleball net, and ask for a warranty or a refund, if applicable.
These are some of the tips for maintaining your pickleball net and keeping it in good condition. By following these tips, you can extend the lifespan of your pickleball net and enjoy the game of pickleball for a long time.
Also Explore these:
Mastering Pickleball Net Maintenance And Repair: A Step-by-Step Guide To Keeping Your Game On Point
Section 5: Adjusting a Tennis Net for Pickleball
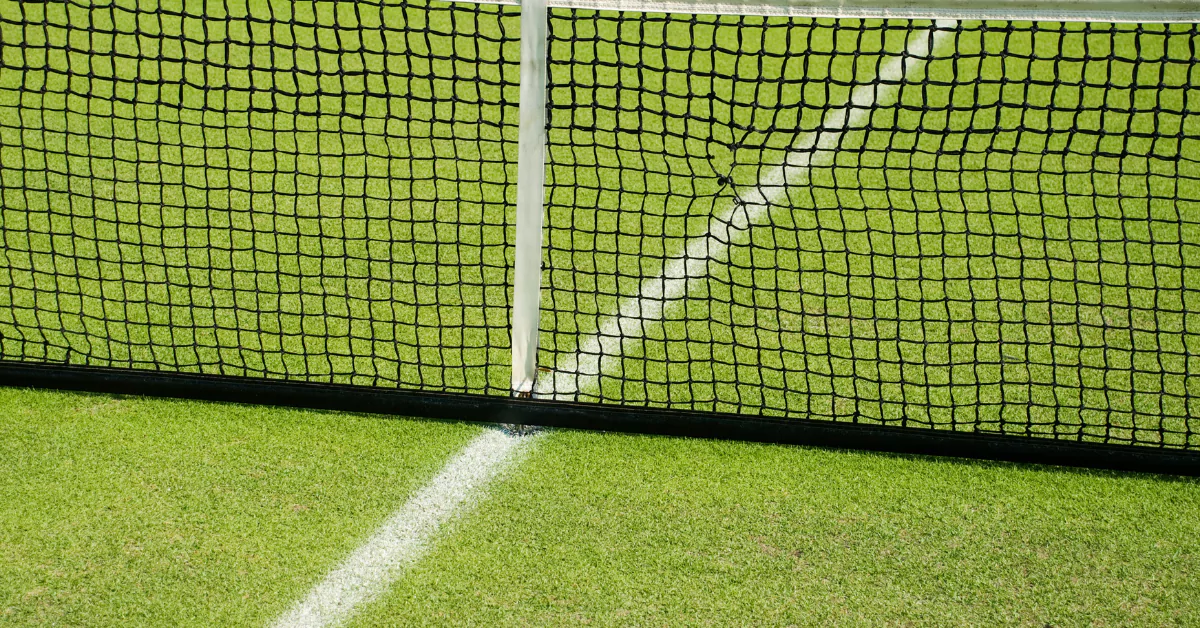
If you do not have a pickleball net or a net stand, but you have access to a tennis court, you can still play pickleball by adjusting a tennis net for pickleball. A tennis net is similar to a pickleball net, but it has different dimensions, materials, and tension. A tennis net is 42 feet wide and 42 inches high at the sidelines, and 36 inches high at the center. It also has a metal cable on the top and a band on the bottom, to attach it to the net posts and the center anchor. A tennis net is usually made of heavy-duty and weather-resistant material, such as polyester or vinyl. It also has a mesh material that allows air to pass through and reduces wind interference.
To adjust a tennis net for pickleball, you need to lower the net height, shorten the net width, and increase the net tension. You also need to mark the pickleball court boundaries and the non-volley zone line on the tennis court. To help you adjust a tennis net for pickleball, we have prepared a step-by-step guide that will walk you through the process. Here are the 8 easy steps to adjust a tennis net for pickleball:
Step-By-Step Conversion Guide
Step 1: Choosing the Right Location
The first step to adjust a tennis net for pickleball is to choose the right location on the tennis court. You want to choose a location that is flat, smooth, and free of cracks, holes, or debris. You also want to choose a location that is away from any obstacles, such as fences, walls, or trees. You also want to choose a location that has enough space for the pickleball court and the players. A pickleball court is 20 feet wide and 44 feet long, and it requires a minimum playing area of 30 feet wide and 60 feet long. A tennis court is 36 feet wide and 78 feet long, and it usually has a 12-foot clearance on each side and a 21-foot clearance on each end. Therefore, you can fit one pickleball court on one half of a tennis court, or two pickleball courts on a full tennis court. You can also use the service line of the tennis court as a reference, as it is 21 feet from the net and coincides with the baseline of the pickleball court.
Step 2: Unpacking the Tennis Net
The second step to adjust a tennis net for pickleball is to unpack the tennis net from the net posts and the center anchor. The net posts are the vertical poles that support the net and keep it at the correct height and width. The center anchor is the part that attaches to the center of the net and adjusts the net tension and height. To unpack the tennis net, follow these steps:
- Loosen the net cable from the net posts, using a wrench or a lever. The net cable is the metal wire that runs along the top of the net and attaches to the net posts.
- Unhook the net band from the net posts, using your hands or a tool. The net band is the white strip that runs along the bottom of the net and attaches to the net posts.
- Detach the net from the center anchor, using your hands or a tool. The center anchor is a metal device that attaches to the center of the net and adjusts the net tension and height.
- Remove the net from the net posts and the center anchor, and lay it flat on the ground.
Step 3: Assembling the Net Frame
The third step to adjust a tennis net for pickleball is to assemble the net frame. The net frame is the part that supports the net and keeps it stable and secure. The net frame consists of two end posts, a base frame, and a center support. The end posts are the vertical poles that hold the net at the correct height and width. The base frame is the horizontal structure that connects the end posts and provides a solid base for the net. The center support is the part that attaches to the center strap of the net and keeps it at the right tension and height.
To assemble the net frame, you can use the same methods we described in Section 1 for making a net stand from everyday items. For example, you can use chain link fence rail, PVC pipes, 5-gallon paint buckets, cast iron bases, or concrete bases to make the net frame. However, you need to make some adjustments to the dimensions and the materials of the net frame, to make it compatible with the tennis net. Here are some of the adjustments you need to make:
- The end posts should be 36 inches high, instead of 34 inches, to match the height of the tennis net at the center.
- The base frame should be 42 feet long, instead of 22 feet, to match the width of the tennis net at the sidelines.
- The center support should be 36 inches high, instead of 34 inches, to match the height of the tennis net at the center.
- The end posts and the center support should have a hole or a hook on the top, to attach the net cable and the center anchor of the tennis net.
- The end posts and the center support should have a slit or a loop on the bottom, to attach the net band and the center strap of the tennis net.
To assemble the net frame, follow the same steps we described in Section 1 for making a net stand from everyday items, but with the adjustments we mentioned above. For example, if you use chain link fence rail to make the net frame, you can follow these steps:
- Cut two pieces of chain link fence rail to 42 feet long, using a hacksaw or a pipe cutter. These will be the base pieces of the net frame.
- Cut the remaining two pieces of chain link fence rail to 36 inches long. These will be the end posts of the net frame.
- Attach an elbow connector to each end of the base pieces, using screws and a drill. Make sure the elbow connectors are facing upward.
- Attach an end cap to each end of the end posts, using screws and a drill. This will prevent the end posts from scratching the surface or injuring anyone.
- Drill a hole through the top of the end posts and the end caps, using a drill and a bit that is slightly larger than the diameter of the net cable. This will allow the net cable to pass through the end posts.
- Cut a slit on the bottom of the end posts, using a hacksaw or a knife. This will allow the net band to pass through the end posts.
- Insert the end posts into the elbow connectors of the base pieces, forming a U-shape. Make sure the end posts are perpendicular to the base pieces and aligned with the center of the elbow connectors.
- Mark the center of the base pieces with a marker, using a tape measure. This will be the location of the center support.
- Drill a hole through the center of the base pieces, using a drill and a bit that is slightly larger than the diameter of the chain link fence rail.
- Cut a piece of chain link fence rail to 36 inches long. This will be the center support of the net frame.
- Drill a hole through the top of the center support, using a drill and a bit that is slightly larger than the diameter of the center anchor. This will allow the center anchor to pass through the center support.
- Cut a slit on the bottom of the center support, using a hacksaw or a knife. This will allow the center strap to pass through the center support.
- Insert the center support through the holes of the base pieces, forming a cross. Make sure the center support is parallel to the end posts and aligned with the center of the base pieces.
- Secure the center support to the base pieces, using screws and a drill.
You have now completed your net frame for adjusting a tennis net for pickleball. You can attach your tennis net to the net frame, following the instructions in the next step.
Step 4: Attaching the Net to the Frame
The fourth step to adjust a tennis net for pickleball is to attach the net to the net frame. The net is the part that hangs between the end posts and creates the barrier for the ball. The net should be made of durable and weather-resistant material, such as polyester or vinyl. The net should have a mesh material that allows air to pass through and reduces wind interference. The net should also have a white band on the top and bottom, to make it more visible and attractive. The net should have a metal cable on the top and a band on the bottom, to attach it to the net posts and the center anchor. To attach the net to the net frame, follow these steps:
- Pass the metal cable of the net through the holes of the end posts and the center support of the net frame, and pull it until it reaches the other end of the net frame.
- Pass the band of the net through the slits of the end posts and the center support of the net frame, and pull it until it reaches the other end of the net frame.
- Secure the net to the net frame, using the hooks or clamps that are attached to the net posts and the center anchor. Make sure the hooks or clamps are tight and locked.
- Make sure the net is evenly stretched and aligned with the net frame. The net should be 42 feet wide and 42 inches high at the sidelines, and 36 inches high at the center. You can use a tape measure to check the net dimensions.
Step 5: Securing the Net in Place
The fifth step to adjust a tennis net for pickleball is to secure the net in place. The net should be stable, secure, and at the right height and tension. To secure the net in place, you need to adjust the net cable, the net band, the center anchor, and the center strap. To adjust the net in place, follow these steps:
- Adjust the net cable, using the wrench or the lever that is attached to the net posts. The net cable is the metal wire that runs along the top of the net and attaches to the net posts. You want to tighten the net cable until the net is at the correct height and tension. The net should be 36 inches high at the center, and should have a slight sag in the middle. You can use a tape measure to check the net height and tension.
- Adjust the net band, using the hooks or clamps that are attached to the net posts. The net band is the white strip that runs along the bottom of the net and attaches to the net posts. You want to tighten the net band until the net is at the correct height and tension. The net should be 42 inches high at the sidelines, and should have a slight sag in the middle. You can use a tape measure to check the net height and tension.
- Adjust the center anchor, using the wrench or the lever that is attached to the center anchor. The center anchor is a metal device that attaches to the center of the net and adjusts the net tension and height. You want to tighten the center anchor until the net is at the correct height and tension. The net should be 36 inches high at the center, and should have a slight sag in the middle. You can use a tape measure to check the net height and tension.
- Adjust the center strap, using the buckle or the hook that is attached to the center strap. The center strap is the part that attaches to the center support of the net frame and adjusts the net tension and height. You want to tighten the center strap until the net is at the correct height and tension. The net should be 34 inches high at the center, and should have a slight sag in the middle. You can use a tape measure to check the net height and tension.
You have now secured the net in place. You can now mark the pickleball court boundaries and the non-volley zone line on the tennis court, following the instructions in the next step.
Step 6: Verifying the Net Height
The sixth step to adjust a tennis net for pickleball is to verify the net height. The net height is the distance from the ground to the top of the net. The net height should be 36 inches at the center, and 34 inches at the sidelines. The net height should also be consistent and even across the net. To verify the net height, you need to use a tape measure and a level. To verify the net height, follow these steps:
- Place the tape measure on the ground, and measure the distance from the ground to the top of the net at the center. The distance should be 36 inches. If the distance is not 36 inches, you need to adjust the net cable, the net band, the center anchor, and the center strap, until the distance is 36 inches.
- Place the tape measure on the ground, and measure the distance from the ground to the top of the net at the sideline. The distance should be 34 inches. If the distance is not 34 inches, you need to adjust the net cable, the net band, the center anchor, and the center strap, until the distance is 34 inches.
- Repeat the same steps for the other sideline of the net.
- Place the level on the top of the net, and check if the net is level and even. The level should show a horizontal line, without any tilt or slope. If the level shows a tilt or slope, you need to adjust the net cable, the net band, the center anchor, and the center strap, until the level shows a horizontal line.
You have now verified the net height. You can now mark the pickleball court boundaries and the non-volley zone line on the tennis court, following the instructions in the next step.
Step 7: Testing the Net
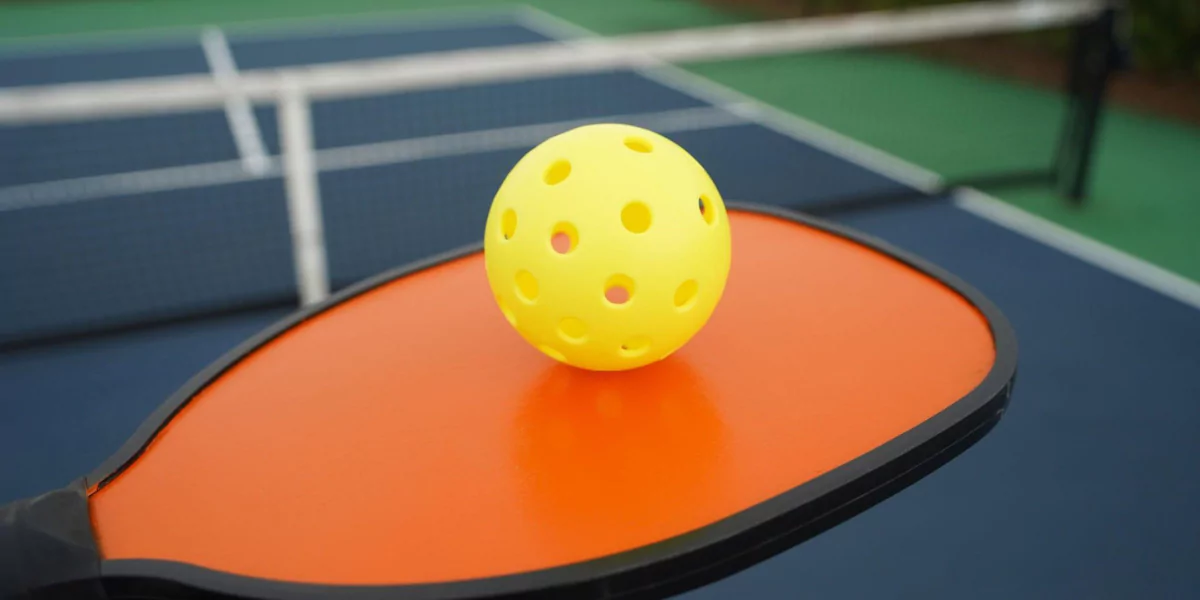
The seventh step to adjust a tennis net for pickleball is to test the net. The net should be stable, secure, and at the right height and tension. The net should also be able to withstand the impact of the ball and the wind. To test the net, you need to use a pickleball and a paddle. To test the net, follow these steps:
- Stand on one side of the net, and hold the pickleball and the paddle in your hands.
- Hit the pickleball over the net, using the paddle, and aim for the center of the net. The pickleball should clear the net without touching it, and land on the other side of the net. If the pickleball hits the net or falls short of the net, you need to adjust the net height and tension, until the pickleball clears the net.
- Repeat the same step for the sidelines of the net. The pickleball should clear the net without touching it, and land on the other side of the net. If the pickleball hits the net or falls short of the net, you need to adjust the net height and tension, until the pickleball clears the net.
- Check the net for any damage or looseness, such as holes, tears, frays, or loose threads. If you find any damage or looseness, you need to repair or replace the affected part as soon as possible.
You have now tested the net. You can now mark the pickleball court boundaries and the non-volley zone line on the tennis court, following the instructions in the next step.
Step 8: Properly Taking Down the Net
The eighth and final step to adjust a tennis net for pickleball is to properly take down the net. The net should be taken down carefully and gently, to avoid damaging or tangling it. The net should also be stored properly when not in use, to prevent it from getting dirty or worn out. To properly take down the net, follow these steps:
- Loosen the center strap, using the buckle or the hook that is attached to the center strap. The center strap is the part that attaches to the center support of the net frame and adjusts the net tension and height.
- Loosen the center anchor, using the wrench or the lever that is attached to the center anchor. The center anchor is the metal device that attaches to the center of the net and adjusts the net tension and height.
- Loosen the net band, using the hooks or clamps that are attached to the net posts. The net band is the white strip that runs along the bottom of the net and attaches to the net posts.
- Loosen the net cable, using the wrench or the lever that is attached to the net posts. The net cable is the metal wire that runs along the top of the net and attaches to the net posts.
- Detach the net from the net frame, and lay it flat on the ground.
- Fold or roll the net carefully, and avoid creasing or twisting it. You can use the velcro strap of the net sleeve to secure the net.
- Place the net in a protective bag or case, and store it in a cool, dry, and shaded place, away from direct sunlight, heat, moisture, and rodents.
You have now properly taken down the net. You can also disassemble the net frame and store it in a similar way.
You have now completed the 8 easy steps to adjust a tennis net for pickleball. You can now enjoy playing pickleball on a tennis court with your friends and family.
Indoor Vs Outdoor Pickleball Net Setup Difference
Here is a table that summarizes the main differences between indoor and outdoor pickleball nets:
| Feature | Indoor Pickleball Net | Outdoor Pickleball Net |
|---|---|---|
| Material | Powder-coated steel or lightweight metal | Carbon-fiber, aerospace-grade metal, or heavy-duty steel |
| Weight | Lighter (14 to 24 pounds) | Heavier (22 to 50 pounds) |
| Stability | Less stable, may tip over or sag in the middle | More stable, have wide bases, center stabilizers, or wheels |
| Durability | Less durable, may corrode or break over time | More durable, rust-resistant, weather-proof, and long-lasting |
| Assembly | Easy to assemble and disassemble, take less than 10 minutes | May require more time and effort to set up and take down |
The main reason for these differences is that indoor and outdoor pickleball nets have to adapt to different climate and court conditions. Indoor nets are designed for smooth and flat surfaces, while outdoor nets have to withstand wind, sun, rain, and uneven terrain. Indoor nets are also more portable and convenient, while outdoor nets are more sturdy and reliable.
Pickleball Net Set up Difference in Indoor vs Outdoor Pickleball Nets
Here is a table that compares the main steps of setting up indoor and outdoor pickleball nets:
| Step | Indoor Pickleball Net | Outdoor Pickleball Net |
|---|---|---|
| 1. Unpack the net system from the carrying case | Unfold the frame and lay it flat on the ground | Unpack the frame, the net, and the stabilizer bar |
| 2. Assemble the frame | Connect the numbered parts according to the instructions | Connect the poles and the base legs with the locking pins |
| 3. Attach the net to the frame | Slide the net over the top poles and secure it with the Velcro straps | Hook the net to the top poles and tighten the straps on both ends |
| 4. Adjust the net height and tension | Use the buckle to adjust the net height to 34 inches at the center and 36 inches at the sides | Use the center rod to adjust the net height to 34 inches at the center and the tension straps to tighten the net |
| 5. Secure the net system | Place the net system on the court and make sure it is stable | Use the wheels or stakes to anchor the net system to the ground and prevent it from moving |
The main reason for these differences is that indoor and outdoor pickleball nets have different designs and materials to suit different environments and surfaces. Indoor nets are simpler and lighter, while outdoor nets are more complex and heavier. Indoor nets are also easier to set up and take down, while outdoor nets may require more time and effort.
Also Read: Net Setup And Maintenance: Essential Guidelines For Optimal Performance
Conclusion
In this article, we have explained the importance of proper pickleball net setup, the options for net stands, the components of a pickleball net, the step-by-step guide to set up your pickleball net, the tips for maintaining your pickleball net, and the way to adjust a tennis net for pickleball. By following this article, you will have a clear understanding of how to set up a pickleball net and enjoy the game to the fullest.
Here are the key takeaways from this article:
- A pickleball net is different from a tennis or badminton net in terms of height, width, and tension. It should be 22 feet wide and 36 inches high at the sidelines, and 34 inches high at the center. It should also have a center strap that adjusts the net tension and keeps it at the correct height.
- You can use a permanent or a portable pickleball net, or you can adjust a tennis net for pickleball. You can also make your own net stand or net frame from everyday items, such as chain link fence rail, PVC pipes, 5-gallon paint buckets, cast iron bases, or concrete bases.
- To set up your pickleball net, you need to follow 7 easy steps: assemble the base frame, insert the end post into the end base, adjust the net center strap, insert the net sleeve into the vertical end post, expand the net towards the other end post, tighten the center strap, and adjust the strap below the bottom of the end post.
- To maintain your pickleball net, you need to inspect and clean it regularly, store it properly when not in use, and repair or replace it when necessary.
- To adjust a tennis net for pickleball, you need to follow 8 easy steps: choose the right location, unpack the tennis net, assemble the net frame, attach the net to the frame, secure the net in place, verify the net height, test the net, and properly take down the net.
Frequently Asked Questions (FAQs)
Let’s address some common questions about pickleball net setup and troubleshooting:
FAQ 1: Can I use any type of net for pickleball?
It is recommended to use a net specifically designed for pickleball to ensure proper dimensions and durability. Pickleball nets are designed to meet the sport’s regulations and provide the best playing experience.
FAQ 2: How often should I inspect and maintain the net and net posts?
Regularly inspect the net and net posts before each game or practice session. Check for any signs of wear, loose parts, or damage. Perform routine maintenance, such as tightening straps and cleaning the net, to ensure optimal performance.
FAQ 3: Can I leave the net set up permanently?
While it’s possible to leave the permanently permanently net set up to take it down after each session to protect it from weather elements and extend its lifespan. However, if you have a dedicated pickleball court, leaving the net set up with proper weatherproofing measures can be an option.